Common Meat Thermometer Errors and How to Fix Them: Troubleshooting Guide
This comprehensive guide identifies and provides solutions for the seven most common meat thermometer errors: inaccurate calibration, incorrect probe placement, not accounting for carryover cooking, using damaged equipment, improper thermometer type for cooking methods, environmental interference, and not allowing sufficient reading time. It also covers advanced troubleshooting for digital and wireless thermometers, DIY recovery methods, repair vs. replacement decisions, and preventive maintenance strategies—all to ensure accurate temperature readings and perfect cooking results.

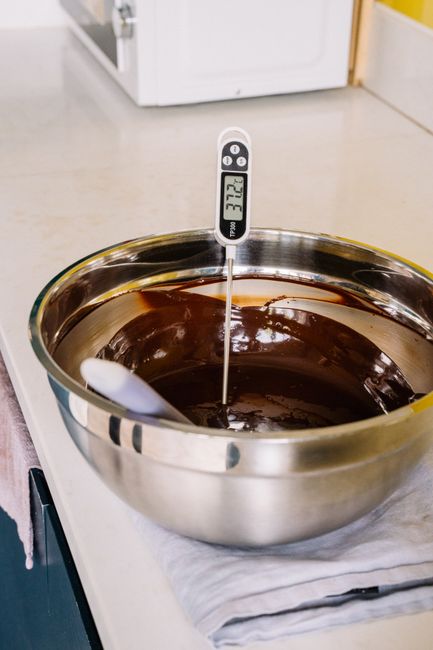
Most thermometer problems have a specific cause and a specific fix. Before you throw it out, run through this list. The most common issue — readings that seem wrong — is usually probe placement or calibration drift, not a broken thermometer.
Error: False or Unstable Readings
Symptoms: Temperature jumps around, reads wildly different on consecutive probes of the same spot, or shows an obviously wrong number (600°F for a chicken breast).
Causes and fixes:
- Probe touching bone or the grill grate: Bone conducts heat differently than meat tissue. Move the probe so it's in the thickest muscle, not touching bone or fat. For burgers, insert horizontally through the side.
- Probe too close to the surface: The outer centimeter of meat is much hotter than the center. Insert at least 1–2 inches into the thickest part.
- Damaged probe tip: A bent or nicked probe tip has inconsistent sensor contact. Inspect the tip — if the thermocouple junction (the metal bead at the very tip) is deformed, the thermometer needs replacement.
- Loose connection between probe and unit: On leave-in thermometers, a loose probe jack causes intermittent readings. Push the probe firmly into the jack and check the cable for kinks or damage near the connector.
Error: Slow Response Time
Symptoms: Takes 15–20 seconds to give a stable reading. Keeps climbing after you think it's settled.
Budget instant-read thermometers are rated at 8–10 seconds. If yours is taking significantly longer, the sensor is likely degraded or the battery is low. Try a fresh battery first — low voltage slows sensor response. If the problem persists, the thermocouple is worn. Response time doesn't improve with use; it only degrades.
For reference: professional models read in 2–3 seconds, mid-range in 4–6 seconds. Anything over 10 seconds on an instant-read is a problem, not a feature.
Error: Consistently High or Low Readings vs. Expected
Symptoms: Meat is clearly overcooked at the temp the thermometer shows as "done," or looks raw when the thermometer shows safe temp.
This is usually probe placement, not thermometer error. Common placement mistakes:
- Whole chicken/turkey: The breast cooks faster than the thigh. Always probe the thigh joint — innermost part, not touching the bone. Breast-only checks let undercooked thigh meat slip through.
- Thick roasts: Probe at the geometric center of the thickest section. Probing from the top hits a different depth than the actual center.
- Thin cuts (burgers, chops): Insert horizontally through the edge, targeting the center. Probing from the top of a ½-inch burger gets you a surface reading.
Check our chicken temperature guide for correct probe positions on poultry cuts.
Error: Calibration Drift
Symptoms: The thermometer reads slightly high or low consistently across all cooks. Verifiable with the ice water test (should read 32°F).
All thermometers drift. Budget models drift faster. Check calibration with ice water — pack a glass with ice, fill with cold water, stir, insert probe in center. If it's off by 1–2°F, recalibrate (if your model allows) or note the offset. If it's off by 4°F+ and can't be corrected, replace it.
Dial thermometers drift more than digital, especially after drops. The calibration nut under the dial face can be adjusted with needle-nose pliers while the probe is in ice water.

Error: Display Issues and Battery Problems
Symptoms: Display is dim, shows partial digits, won't turn on, or shuts off mid-read.
- Dim or partial display: Low battery. Replace first before diagnosing further. Most digital thermometers use CR2032 or AAA batteries — check the manual.
- Unit won't turn on: Check the battery contacts for corrosion (white or green residue). Clean with a dry cotton swab or a small amount of isopropyl alcohol. Don't use water.
- Shuts off while reading: Usually auto-shutoff triggering too fast (common on budget models) or a dying battery causing voltage drops. Replace the battery and check if auto-shutoff settings are adjustable.
- Reading drifts then shuts off: Voltage drop from a nearly dead battery. The thermometer gives unstable readings as the battery struggles to power the sensor. Replace immediately.
Error: Water or Heat Damage
Symptoms: Thermometer stopped working after washing, submersion, or being left near the grill.
Most budget thermometers are rated as "splash resistant" — meaning they can handle a quick rinse but not submersion. If yours went into the sink or dishwasher, the moisture may have reached the internal electronics. Try drying it completely (24+ hours in a dry warm space, or with silica gel packets) before writing it off. Sometimes it recovers; often it doesn't.
Heat damage from leaving the thermometer too close to an active grill (over 300°F ambient) can warp plastic housings and damage sensors. Professional models with IP67 rating and higher-temp tolerances handle this better. For grilling in hot ambient conditions, check the thermometer's max ambient temperature spec — many budget models cap at 122°F ambient, which an active grill easily exceeds.
When to Replace Instead of Fix
Some problems aren't worth troubleshooting:
- Probe tip is physically damaged or bent — sensor accuracy is gone
- Calibration error exceeds 4°F and the unit can't be adjusted
- Water ingress caused permanent display failure
- Response time has degraded to 15+ seconds on an instant-read
- Budget thermometer over 2 years old with multiple issues — the cumulative cost of bad readings exceeds replacement cost
If you're replacing, it's worth stepping up to a model with IP67 waterproofing and ±1°F accuracy. The fix for most recurring thermometer problems is buying a better thermometer once instead of cheap ones repeatedly.
Frequently Asked Questions
Why does my meat thermometer give different readings each time?
Inconsistent readings are almost always probe placement — different spots in the meat have different temperatures. Make sure you're probing the same location (thickest part, away from bone and fat) and waiting for the reading to fully stabilize before removing the probe.
Why is my meat thermometer reading too high?
Most likely the probe is touching bone (which conducts heat faster than meat), too close to the surface, or near a fat pocket. Reinsert into the thickest muscle tissue, away from bone and fat. If readings are consistently high across calibration checks (ice water test), the thermometer has drifted and needs recalibration.
Can I fix a meat thermometer that got wet?
Sometimes. Remove the battery, dry the unit completely for 24–48 hours in a warm environment, then test. If it was fully submerged and isn't rated IP67+, recovery is unlikely. Budget "splash resistant" models rarely survive submersion.
How do I fix a slow meat thermometer?
Replace the battery first — low voltage slows sensor response. If it's still slow after a fresh battery, the thermocouple sensor has degraded and won't recover. Slow instant-reads (15+ seconds) are at end of useful life.
Why does my thermometer shut off before I get a reading?
Auto-shutoff is triggering too fast, or the battery is dying and causing voltage drops. Replace the battery. If the problem persists, check if the auto-shutoff timeout is adjustable in the settings. Some budget models have very short shutoff timers that can't be changed.
When should I replace my meat thermometer instead of repairing it?
Replace when: the probe tip is physically damaged, calibration error exceeds 4°F and can't be corrected, water damage caused permanent failure, or response time has degraded beyond 15 seconds. Budget thermometers over 2 years old with multiple issues are usually better replaced than repaired.
Recommended by Titan Grillers
IP67 Waterproof Digital Meat Thermometer
Reads in 2–3 seconds · Backlit LCD · Built-in magnet · Free returns


