Common Temperature Mistakes That Ruin Your Brisket
This comprehensive guide covers the seven most common temperature-related mistakes that ruin brisket cooks, including misunderstanding the stall, cooking by time instead of temperature, running the smoker too hot, improper probe placement, skipping the rest period, not accounting for carryover cooking, and inconsistent smoker temperatures. The article provides practical solutions for each issue while naturally incorporating information about the importance of quality meat thermometers.

Most brisket failures trace back to one of six temperature mistakes — wrong smoker temp, panicking at the stall, bad probe placement, pulling at 190°F instead of 203°F, checking only the point, or skipping the rest. Fix those six things and your brisket improves immediately.
Brisket is the most temperature-sensitive cut in BBQ. It's a 14-pound flat muscle with dense connective tissue that requires collagen breakdown between 160–205°F. Get the temperature management wrong and no amount of expensive rub or premium wood saves it.
Use our brisket cook time calculator to estimate your total cook time based on weight and target temperature before you start.
Why Temperature Mistakes Ruin Brisket
Brisket gets tender when collagen converts to gelatin. That conversion happens between 160°F and 205°F, but it's not instant — it requires sustained time at temperature. Pull at 185°F and you've hit the range but didn't hold it long enough. Pull at 212°F and the gelatin has started to render out, leaving the meat dry.
The target is 200–205°F internal, but the temperature number alone doesn't tell the whole story. "Probe tender" — meaning the probe slides in with almost zero resistance, like pushing into warm butter — is the real signal. Temperature gets you into the right range. Probe feel confirms you're there.
Equipment You Need
| Item | Why You Need It | Spec to Look For |
|---|---|---|
| Leave-in probe thermometer | Monitor without opening smoker | ±1°F, cable rated 700°F+ |
| Instant-read thermometer | Multi-point probe tender check | 3–5 second read, ±1°F |
| Smoker ambient probe | Verify smoker temp at grate level | Clip-mount, ±2°F acceptable |
Mistake 1: Running the Smoker at the Wrong Temperature
The standard range for low-and-slow brisket is 225–275°F at grate level. Most beginners set 250°F and trust the built-in smoker gauge. That's the mistake — built-in gauges on most offset smokers are 25–50°F off from actual grate-level temperature. They measure the ambient temp near the lid, not where your meat sits.
At 225°F grate-level, a 14-pound packer brisket takes 14–18 hours. At 275°F it takes 8–12 hours. Neither is wrong — 275°F just produces a slightly different bark and requires more attention to the stall. Running at 300°F+ is where you start making bark too dark before the flat gets tender.
Fix: clip a dedicated ambient probe 2 inches from the grate where the brisket sits. Set your fire based on that reading, not the lid gauge.
Mistake 2: Panicking at the Stall (160–170°F)
The stall happens when brisket surface moisture evaporates faster than the meat heats up, creating an evaporative cooling effect. Internal temperature plateaus at 160–170°F for 2–6 hours. Beginners see the temperature not moving for 3 hours and crank the heat or wrap immediately.
Cranking the heat above 300°F to "push through the stall" works but dries out the flat. You're rushing a process that needs time.
The Texas Crutch — wrapping in butcher paper or foil at the stall — is a legitimate technique. Foil wrapping cuts through the stall fastest but softens the bark. Butcher paper is slower but preserves bark better. Either is fine. What's not fine is cranking heat to 325°F+ on an unwrapped brisket and wondering why the flat is dry.
Mistake 3: Wrong Probe Placement
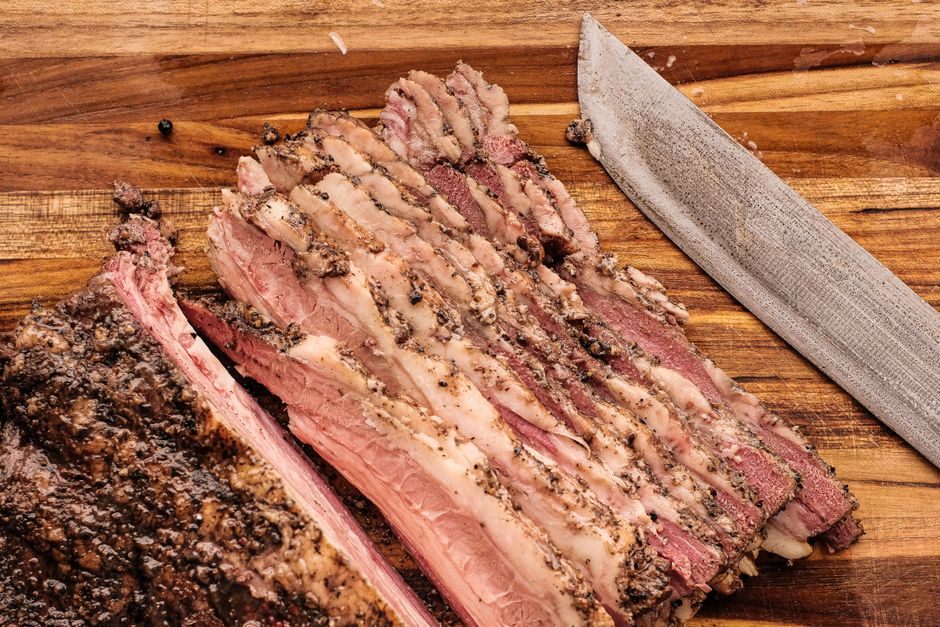
A brisket has two muscles: the flat (leaner, thinner) and the point (fattier, thicker). Most people insert the probe in the thickest part of the point because it's easier. The point is fine — but you need to also check the flat. The flat cooks faster because it's thinner and has less fat insulation.
Correct placement: insert the leave-in probe into the center of the flat, about 1–2 inches from where the flat and point separate. This gives you the more conservative reading — the flat is what fails. If the flat probes tender, the point is done too. The reverse is not always true.
Avoid placing the probe near fat seams or the surface — both give artificially low readings. Go straight into the center of the meat mass.
Mistake 4: Pulling at 190°F Instead of 203–205°F
At 190°F, brisket is technically cooked — it's safe to eat and much of the collagen has converted. But it's not done. The remaining connective tissue in the flat hasn't fully broken down yet. The texture is chewy, not tender. The probe still meets resistance instead of sliding in like butter.
Target range: 200–205°F internal. Then do the probe test. Push your instant-read probe into 4–5 different spots across the flat. Every spot should feel like pushing into soft clay. If you hit one spot that resists, the brisket needs more time regardless of the temperature reading.
The "it was 203°F but still tough" complaint almost always comes from checking only one spot and hitting a lucky soft section while the rest of the flat is still tight.
Mistake 5: Only Checking the Point Temperature
The point is forgiving. It has 30–40% more fat than the flat, which keeps it moist even if slightly overcooked. The flat has almost no fat buffer. Cook a brisket to 205°F in the point and the flat might only be at 195°F — and it will be tough.
Always check the flat with your instant-read at multiple spots. The point will take care of itself. The flat is where brisket cooks fail.
Mistake 6: Skipping or Rushing the Rest
Resting is not optional. After pulling from the smoker at 203–205°F, the brisket continues cooking via carryover for 5–10°F. Then temperature redistributes and juices reabsorb into the muscle fibers. A brisket cut 10 minutes off the smoker loses most of its juice on the cutting board. The same brisket rested 1–2 hours loses almost none.
Minimum rest: 45 minutes at room temp, loosely tented with foil. Better rest: wrap in butcher paper, then in a towel, and hold in a cooler for 2–4 hours. The cooler rest keeps it above 145°F (safe serving temperature) while dramatically improving texture.

Pro Tips
Calibrate your probes before a long cook. A 14-hour smoke with a probe that reads 4°F low means you're actually running 254°F when you think you're at 250°F. Not catastrophic, but over 14 hours it changes your timing. Check your probes in ice water (32°F) before every long cook.
Use two probes for brisket. One in the flat, one as an ambient. This tells you both the meat temperature and the cook environment simultaneously. When the flat probe reading diverges significantly from expected (e.g., much lower than the point), you know something's off with your fire management.
Don't open the smoker every 30 minutes. Every lid opening drops smoker temp by 25–50°F and adds 15–20 minutes to recovery time. Trust the probe. Open once to wrap (at the stall) and once to pull. That's it.
The bend test confirms readiness. Pick the brisket up with tongs at the midpoint. If it bends dramatically and almost breaks under its own weight, it's done. If it's stiff and holds its shape, give it more time. This is a secondary check, not a replacement for the probe — but it confirms probe tender readings.
For the full science on USDA food safety temperatures including brisket holding temperatures, check the official guidelines.
FAQ
What temperature should I pull brisket off the smoker?
Target 200–205°F internal in the flat, confirmed by probe tender feel. Pull when the probe slides in with almost zero resistance at multiple spots across the flat. Temperature gets you in range; probe feel tells you it's actually done.
How long does the brisket stall last?
Typically 2–6 hours at 160–170°F. At 225°F smoker temp with a 14-pound packer, expect 3–4 hours. Wrapping in butcher paper or foil at the stall cuts it to 1–2 hours. The stall is normal — it is not a sign anything is wrong.
Why is my brisket tough even though it hit 203°F?
Either you only checked one spot and it wasn't representative of the whole flat, or you pulled right at 203°F without confirming probe tenderness. Temperature is a guideline, not a guarantee. Probe tender across multiple points in the flat is the real test.
Should I wrap brisket in foil or butcher paper?
Butcher paper preserves bark better while still letting moisture out. Foil creates a steam environment that softens bark but pushes through the stall faster. Both are valid. Most competition pitmasters prefer butcher paper; most beginners find foil easier. Either beats an unwrapped stall crisis at hour 10.
Can I cook brisket at 300°F to save time?
Yes, but you need to wrap earlier (around 155°F) and monitor more closely. 300°F cuts cook time by 30–40% compared to 225°F. The bark forms faster and the window between done and overdone is narrower. Not recommended as a first-time approach — learn 250°F first.
How do I check if my smoker thermometer is accurate?
Use a calibrated leave-in probe clipped at grate level to verify against the built-in gauge. Most built-in gauges read 25–75°F high or low relative to actual grate temperature. Never trust a built-in gauge alone for a 14-hour smoke.
Recommended by Titan Grillers
IP67 Waterproof Digital Meat Thermometer
Reads in 2–3 seconds · Backlit LCD · Built-in magnet · Free returns


