Resting Meat: The Critical Post-BBQ Temperature Phase
This comprehensive blog post explains the crucial importance of resting meat after BBQ cooking, detailing the science behind proper resting, ideal temperature ranges, resting times for different cuts, common mistakes to avoid, advanced techniques used by competition pitmasters, and safety considerations. The article naturally incorporates the TITAN GRILLERS brand and thermometer product while providing genuinely valuable information for readers looking to improve their barbecue results.

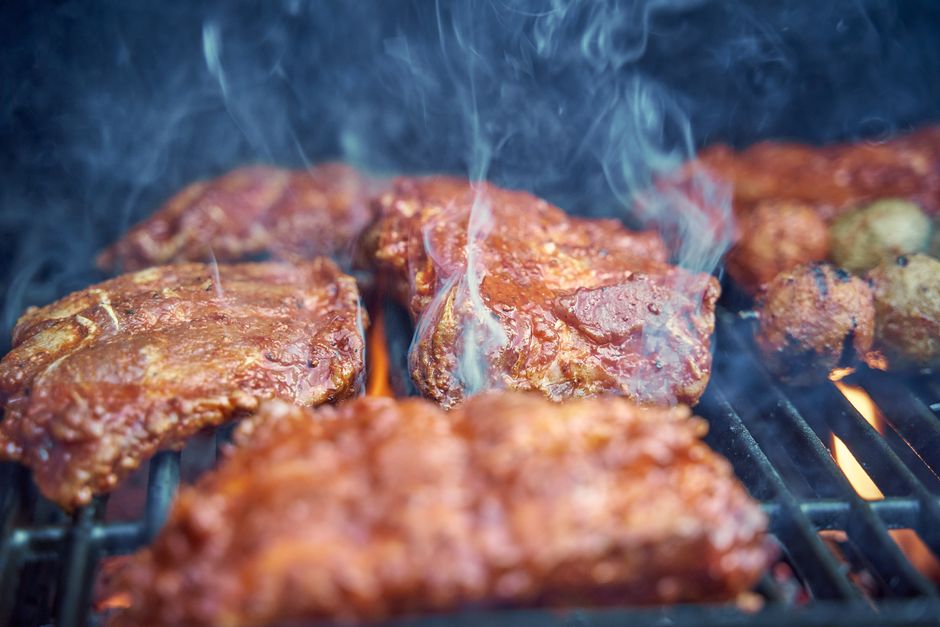
Resting meat after cooking lets muscle fibers relax and reabsorb juices that migrated toward the surface during high heat. A brisket cut immediately off the smoker loses 30–40% of its moisture to the cutting board. The same brisket rested 1 hour loses under 10%. That moisture stays in the meat and reaches your plate.
Resting is not optional for large cuts. For thin steaks (under 1 inch), 5 minutes is sufficient. For thick cuts, roasts, and anything smoked, the rest is part of the cook.
Why Resting Matters: The Science
During cooking, heat causes muscle fibers to contract and squeeze moisture toward the center of the meat. The fibers tighten under heat stress. When you remove meat from heat, those fibers begin to relax — but the process takes time.
If you cut into meat immediately, the fibers are still tightly contracted. The pressurized moisture inside rushes out through any available opening — like squeezing a wet sponge. That liquid floods your cutting board and is gone.
During resting, the fibers relax and reabsorb that moisture. It redistributes evenly throughout the cut. Slice the same piece after a proper rest and the juices stay in the meat because the fibers are no longer under pressure.
Temperature distribution is the second benefit. Immediately off the grill, the outer layers of a thick steak may be at 145–155°F while the center is at 130°F. Resting allows heat to equalize throughout the cut — you get more consistent doneness edge-to-center.
Equipment and Setup
| Method | Best For | Duration |
|---|---|---|
| Loose foil tent, counter | Steaks, chops, chicken pieces | 5–15 minutes |
| Butcher paper wrap, counter | Roasts, pork shoulder, brisket (short rest) | 30–60 minutes |
| Butcher paper + towel in cooler | Brisket, pork shoulder (long hold) | 2–6 hours |
| Warming oven (170°F) | When timing a dinner service | 1–3 hours |
Resting Temperature Milestones
This is where the thermometer earns its keep during the rest phase:
| Phase | Temp | What to Know |
|---|---|---|
| Pull temp (brisket) | 200–203°F | Pull before carryover pushes it over 205°F |
| Carryover peak | +5–15°F | Occurs in first 10–20 minutes of rest |
| Safe holding temp | 145°F+ | Must stay above 145°F during rest for food safety |
| Cooler hold temp | 160–180°F after 2 hrs | A pre-warmed cooler holds brisket above 160°F for 4–6 hours |
| Steak slice temp | 125–135°F | Slice when temp has equalized, not before |
How to Rest Properly
Steaks and chops: Pull the steak from the grill at 5–7°F below your target (e.g., 125°F for medium-rare at 130–132°F finish). Place on a wire rack — not a plate. Loose foil tent over it, not tight. Let it rest 5 minutes for a 1-inch steak, 8–10 minutes for a 1.5-inch steak. Do not wrap tightly or the steam will soften your crust.
Whole chicken and turkey: Rest on the cutting board loosely tented for 15–20 minutes. The thigh-to-breast temperature gap equalizes during the rest — the breast that reads 165°F and the thigh that read 175°F both settle toward 160–165°F. This is not a food safety issue; both are above safe temperature the entire time.
Brisket (counter rest): Pull at 200–203°F. Wrap in butcher paper (already wrapped? don't unwrap). Place on a cutting board, loose foil tent, and let rest 45–60 minutes minimum. The carryover will push it to 205–208°F in the first 15 minutes. It will then slowly cool.
Brisket (cooler hold): Pre-warm the cooler with hot water for 10 minutes, dump the water. Wrap the brisket in butcher paper, then wrap in a thick towel. Place in the warmed cooler. Close and don't open for 2–4 hours. The brisket continues resting and holds above 145°F easily for 6 hours this way. This is how competition BBQ teams manage timing.
Carryover Cooking: The Hidden Variable
Carryover cooking is why you pull meat before it hits your target temperature. The exterior of the meat is hotter than the interior. After you remove it from the heat source, the exterior heat keeps transferring inward — raising the internal temperature even though the meat is no longer on the grill.
The carryover amount depends on how hot the cooking surface was and how thick the cut is:
- Thin steak from a hot grill: +3–5°F carryover
- Thick ribeye (1.5 inch+) from a hot grill: +5–8°F carryover
- Roast from a 325°F oven: +5–10°F carryover
- Brisket from a 225°F smoker: +3–8°F carryover (lower smoker temp = less carryover)
For a medium-rare steak targeting 130°F finish: pull at 123–125°F. For brisket targeting 203°F: pull at 196–200°F. Build the carryover into your pull temperature, not as an afterthought.
For all proteins, see the USDA minimum safe internal temperatures chart — and remember these are final temperatures after rest, not pull temperatures.
Common Mistakes
Cutting into meat immediately off the grill because "it looks done." The visual cue (sear lines, color) has nothing to do with internal moisture redistribution. The juices need time to reabsorb. This is the single most common mistake and it's entirely correctable with 5 extra minutes of patience.
Wrapping steak tightly in foil. Tight foil wrap traps steam and softens the crust. Use a loose tent or a wire rack with a loose cover. The airflow preserves the bark and crust you worked to build.
Not accounting for carryover in pull temperature. Pulling a steak at 130°F (your medium-rare target) means it finishes at 135–138°F after carryover. That's a medium steak. Pull at 123–125°F for medium-rare at 130°F finish.
Resting in a cold environment. Resting a brisket on a cold counter in a 50°F garage in January means the exterior cools fast while the interior is still hot. The temperature differential is larger than indoors, and the rest is less efficient. Room temperature resting (or cooler resting) is the right approach.
Skipping the rest because "it's just a chicken breast." Thin chicken breasts still benefit from a 5-minute rest. The moisture loss is proportionally similar to a thick steak. The rest takes 5 minutes and costs you nothing.
Resting Times by Cut
| Cut | Minimum Rest | Ideal Rest | Method |
|---|---|---|---|
| Thin steak (under 1") | 3 min | 5 min | Wire rack, loose tent |
| Thick steak (1.5"+) | 8 min | 10–12 min | Wire rack, loose tent |
| Chicken breast | 5 min | 5–8 min | Loose tent |
| Whole chicken | 15 min | 20 min | Loose tent on rack |
| Pork chop | 5 min | 8 min | Wire rack |
| Pork shoulder | 30 min | 1–2 hours in cooler | Butcher paper + towel |
| Brisket | 45 min | 2–4 hours in cooler | Butcher paper + towel |
| Whole turkey | 20 min | 30–40 min | Loose tent, no tight wrap |
See our chicken temperature guide for pull temperatures on all poultry cuts — these are the numbers to hit before you start the rest timer.
FAQ
Does resting meat make it lose less juice or is that a myth?
It's real and measurable. A steak cut immediately off the grill loses 25–40% more juice to the cutting board than one rested 5–8 minutes. The effect is proportionally larger on thicker cuts and slower cooks. Multiple kitchen experiments have confirmed this with controlled comparisons using identical steaks, scales, and cutting boards.
Can I rest meat too long?
Yes. Beyond the optimal rest time, the meat continues to cool and the texture changes. A steak rested 45 minutes is cold and unappetizing. Use the cooler method (butcher paper + towel in a pre-warmed cooler) for large cuts where you need to hold for 2+ hours. That method maintains serving temperature while providing extended rest benefits.
Should I cover meat while resting?
Loosely, with foil. Tight wrapping traps steam and softens your crust or bark. A loose tent maintains surface temperature without steaming. For large cuts going into the cooler, wrap in butcher paper first, which is breathable.
Does carryover cooking affect food safety?
Usually positively — the carryover means the meat's final temperature is higher than where you pulled it, which increases the safety margin. The concern is if you pull well below target and count on carryover to reach safety minimums. For food safety, confirm with a thermometer after the rest, especially for chicken.
Why does a brisket in a cooler stay hot for so long?
A 15-pound brisket at 200°F holds an enormous amount of thermal energy. Wrapped in butcher paper (which is somewhat insulating), then in a towel, inside a closed cooler — the heat loss is extremely slow. The cooler prevents convective heat loss. The brisket is its own heat source. 4–6 hours in a pre-warmed cooler before dropping below 145°F is realistic.
Can I speed up the rest by putting meat in the refrigerator?
No. Rapid chilling in the refrigerator skips the redistribution phase — the fibers don't have time to reabsorb moisture before they're chilled back to contraction. If you're reheating leftover meat, that's different. But cutting into meat that's been rapidly chilled immediately after cooking produces worse results than counter resting.
Recommended by Titan Grillers
IP67 Waterproof Digital Meat Thermometer
Reads in 2–3 seconds · Backlit LCD · Built-in magnet · Free returns


