The Ultimate Guide to Budget Meat Thermometers: Perfect Cooking Without Breaking the Bank (2025)
The Ultimate Guide to Budget Meat Thermometers explores how affordable meat thermometers ($10-40) can deliver professional-level results for home cooks. The comprehensive guide covers different types of budget thermometers (instant-read digital, leave-in digital, analog dial, smart wireless, and infrared), key features to look for when purchasing, top recommendations for 2025 across various price points, proper usage techniques, maintenance tips, and a comparison between budget and premium options. The article emphasizes that with proper technique, budget meat thermometers can provide the accuracy needed for food safety and cooking precision, making expensive models unnecessary for most home cooks.

Most home cooks don't need to spend more than $30 on a meat thermometer. The $15–30 price range covers instant-read thermometers that are accurate enough for food safety, fast enough for real cooking, and reliable enough for years of regular use — if you buy the right one and treat it correctly. This guide covers exactly that.
What to Look For in a Budget Thermometer
At sub-$30 prices, the field thins fast. Most thermometers in this range share the same sensor components from the same factories — the differences are build quality, display design, and which features didn't get cut to hit the price point. These are the specs that actually matter:
- Accuracy: ±2°F or better. This is the headline spec. At ±2°F, a reading of 165°F means actual temperature is 163–167°F — adequate for food safety. Budget models rated ±4°F or worse aren't worth buying. Check the spec sheet, not the marketing copy.
- Response time: under 10 seconds. An instant-read that takes 15 seconds isn't instant. Budget models range from 5–12 seconds. The faster end of that range (5–7 seconds) exists at $20–25 — no need to accept 12-second reads.
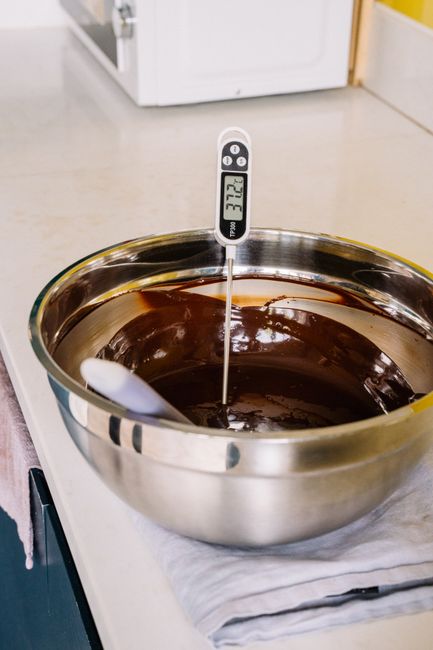
- Probe length: at least 4 inches. Shorter probes don't reach the center of a thick roast or whole chicken. 4–5 inches is the practical minimum for most cuts.
- Backlit display. Not critical, but grilling happens in the dark and over smoke. Worth the $3–5 price difference if two otherwise comparable models are available.
- Folding probe with auto-on. A probe that folds into the handle protects the tip in storage and turns the unit on automatically when opened. Both features extend the thermometer's life and usability.
Types of Budget Thermometers
Four types exist at budget prices. They serve different use cases.
Instant-read digital thermometers ($10–35)
The most useful category for most home cooks. You pull it out, insert the probe, get a reading in 5–10 seconds, and put it away. Good for steaks, burgers, chicken, pork chops, fish — anything where you're checking one cut at one moment.
The limitation: you have to be at the grill to use it. You can't monitor a 14-hour brisket with an instant-read. For that, you need a leave-in model.
Leave-in probe thermometers ($20–50)
A probe that stays in the meat throughout the cook, attached via a heat-resistant cable to a display unit. The display sits on the counter or clips to the grill handle, showing continuous temperature readings without opening the lid. Essential for low-and-slow BBQ, roasting, and overnight smokes.
Budget leave-in models typically support 1–2 probes. The probe cables are the weak point — they fail faster than the electronics. Look for braided or reinforced cables, not bare silicone.
Dial (bimetallic) thermometers ($8–20)
The old standard — a metal probe with a dial face that spins to show temperature. They work, but they're slower (15–30 seconds for a stable reading), less accurate, and drift faster after drops. The calibration nut under the dial face can be adjusted, which is a feature digital budget models often lack.
Best use case: oven roasting where you leave the thermometer in the roast for the full cook. Not recommended as a primary grill thermometer in 2025 — digital instant-reads have largely made them obsolete for the same price.
Infrared (non-contact) thermometers ($20–40)
Point at a surface and get a surface temperature. Fast and useful for checking grill grate temperature, cast iron pan temperature, and flat-top griddle evenness. Not useful for internal meat temperature — they read surfaces only, not interior temperature. Often bought by accident when someone wants a meat thermometer. Don't confuse the two.
| Type | Price Range | Best For | Not For |
|---|---|---|---|
| Instant-read digital | $10–35 | Steaks, burgers, chicken, pork | Continuous monitoring during long cooks |
| Leave-in probe | $20–50 | Smoking, roasting, overnight cooks | Quick spot-checks on multiple cuts |
| Dial (bimetallic) | $8–20 | Oven roasts (stays in cut) | Fast grilling, precision doneness |
| Infrared | $20–40 | Surface temps, grill grate checking | Internal meat temperature (reads surface only) |
How Accurate Are Cheap Thermometers?
Out of the box, a $20 thermometer rated ±2°F is legitimately ±2°F in most cases. The factory spec is tested at controlled conditions; real-world variation adds maybe another 1°F. That's still within ±3°F total — adequate for every food safety application.
The problem is over time. Budget thermometers drift. A model that was ±2°F out of the box can be ±5°F after 18 months without calibration checks. Premium thermometers ($80–150) drift slower and can be recalibrated when they do. Most budget models can't be recalibrated — when they drift too far, you replace them.
Test yours in ice water immediately after buying: pack a glass with ice, fill with cold water, stir, insert probe into the center without touching the glass walls. It should read 32°F. If it reads 30–34°F, note the offset and adjust your cooking accordingly. If it reads outside that range on a brand-new unit, return it.
Repeat this test every 3–4 months of regular use, or after any drop or extreme heat exposure. See the full process in our thermometer calibration guide.
Best Budget Picks by Category
Specific model recommendations shift as new versions release, but the categories and what to look for within them are stable:
Best overall instant-read under $25
Look for: ±2°F accuracy, 5–7 second response time, folding probe, auto-on when opened, backlit display. In this price range, models from ThermoPro (TP03, TP19) and Lavatools (Javelin) consistently hit these specs. Both are made in the same general supply chain as more expensive models with fewer quality control compromises than no-name alternatives.
Best leave-in under $40
Look for: 2 probes minimum (one for meat, one for pit temperature), braided probe cable rated to 716°F+, display with temperature alerts, signal range of at least 300 feet. ThermoPro TP20 and Inkbird IBT-4XS are the standard recommendations at this price. Both have phone apps of varying quality — the physical display unit is more reliable than the app for overnight cooking.
Best for beginners who want one tool
A folding instant-read in the $20–25 range does 90% of what most home cooks need. It handles steaks, burgers, chicken, pork chops, and fish. The only thing it won't do is monitor a long smoke without someone checking periodically. If you're starting out and unsure which type to buy, get the instant-read first.

Getting Accurate Reads from a Budget Model
The thermometer's accuracy spec only applies if you use it correctly. These mistakes produce wrong readings even from a well-calibrated unit:
- Probing from the top on thin cuts. A burger or pork chop probed from the top has the probe tip near the surface, not the center. Insert horizontally from the side, targeting the geometric center of the thickest part.
- Touching bone. Bone conducts heat faster than muscle. A probe touching bone reads higher than the surrounding meat. Keep the tip in muscle tissue, not touching bone.
- Reading before stabilization. Budget thermometers need 5–10 full seconds to stabilize. The number keeps rising for the first 2–3 seconds — that's not the real temperature. Wait until it stops moving.
- Probing near the surface. The outer centimeter of any piece of meat is significantly hotter than the center. Insert at least 1.5–2 inches into the thickest part of the cut.
For cut-specific probe placement, check our chicken temperature guide — the same principles apply across poultry cuts.
Maintenance and Longevity
Budget thermometers have a shorter natural lifespan than premium models, but most fail earlier than they should from avoidable causes:
- Submersion in water. Budget thermometers are splash-resistant, not waterproof. Running the probe under the faucet is fine; dropping the whole unit in the sink is not. The electronics aren't sealed. Clean the probe with a damp cloth — don't wash the unit under running water.
- Leaving it near the grill. The ambient temperature around an active grill can exceed 300°F — well above the rated max ambient for most budget thermometers (~122°F). Store it away from the grill between uses.
- Bent probe tips. The thermocouple is at the very tip. A bent tip has a deformed sensor element that gives inaccurate readings. Store the unit with the probe folded into the handle, not loose in a drawer with metal utensils.
- Low battery. A weak battery slows response time and produces inaccurate readings before it fails completely. Replace annually or at the first sign of sluggish response.
With proper care, a $20–25 budget instant-read can last 2–3 years of weekly use. Without it, 12 months is optimistic.
When It Makes Sense to Upgrade
Budget thermometers cover most cooking situations. These are the specific scenarios where upgrading to $60–100+ starts making sense:
- Weekly low-and-slow BBQ smoking. If you're doing 12–16 hour brisket cooks regularly, you need a reliable leave-in with a durable probe cable. Budget leave-in cables fail faster under sustained high heat. A $80–100 system pays for itself in prevented failures.
- Precision cooking for specific targets. If you're reverse-searing thick ribeyes targeting exactly 130°F, ±4°F from a drifted budget model is significant. A ±1°F premium instant-read removes that variability.
- After the second budget thermometer dies in two years. The cumulative cost of replacing $25 thermometers every year eventually exceeds the $80 model that lasts five. Do the math on your actual replacement rate.
- Cooking for food-sensitive guests. Immunocompromised people, pregnant guests, young children — situations where being 3–4°F off on chicken matters more than it would in a normal household context.
Frequently Asked Questions
What is the best budget meat thermometer under $30?
Look for a folding instant-read with ±2°F accuracy, 5–7 second response time, and backlit display. ThermoPro TP19 and Lavatools Javelin consistently hit these specs in the $20–28 range. Test in ice water immediately after buying — should read 32°F within ±2°F.
Are cheap meat thermometers accurate enough for food safety?
Yes — when new and calibrated, a budget thermometer rated ±2°F is accurate enough for all food safety purposes. The concern is drift over time: budget models drift faster than premium ones and often can't be recalibrated. Test with ice water every few months to catch significant drift before it affects your cooking.
What's the difference between a cheap and expensive meat thermometer?
Response time (8–12 seconds vs 2–3 seconds), accuracy (±4°F vs ±1°F), waterproofing (splash-resistant vs IP67), calibration capability, and long-term durability. Budget thermometers work when new; premium models work reliably for 5+ years of hard use. The right choice depends on how often you cook and what conditions you use it in.
Do I need a leave-in or instant-read thermometer?
Instant-read for most home grilling: steaks, burgers, chicken, pork. Leave-in for long cooks where you need continuous monitoring — smoking brisket, roasting a whole turkey, overnight cooks where you can't check manually every 30 minutes. Many cooks eventually own both; start with the instant-read.
How do I test if my cheap thermometer is accurate?
Ice water test: pack a glass with ice, add cold water, stir for 30 seconds, insert probe into the center (not touching the glass). Wait 30 seconds. Should read 32°F. If it's within 2°F, your thermometer is within spec. Over 4°F off on a new unit — return it. Over 4°F off on an old unit — replace it.
How long should a budget meat thermometer last?
1–2 years with regular weekly use. Up to 3 years with proper care: no submersion, probe stored folded, battery replaced annually, kept away from high ambient heat near the grill. Most budget thermometers that fail early die from water damage or bent probe tips — both preventable.
Recommended by Titan Grillers
IP67 Waterproof Digital Meat Thermometer
Reads in 2–3 seconds · Backlit LCD · Built-in magnet · Free returns


